Okay, so I wanted to grab some tickets for a Mets game over at Citi Field. Been a while, and I really wanted to make sure I got decent seats this time around. Last time, I kinda just picked a section number and hoped for the best, ended up staring at a pole half the game. Not doing that again.
Finding the Virtual View
First thing I did was hop online. I figured the Mets official site would have something, maybe a map or whatever. I poked around there for a bit. Found the ticketing section, obviously, but I was looking specifically for that virtual seat view thing I’d heard people talk about. Took a few clicks, navigating through the ticket options and stadium info pages.
Eventually, I landed on a page that specifically mentioned a “Virtual Venue” or something similar. It wasn’t super obvious at first, had to hunt for it a little. Once I clicked that, it loaded up this interactive map of Citi Field.
Using the Seating Chart Tool
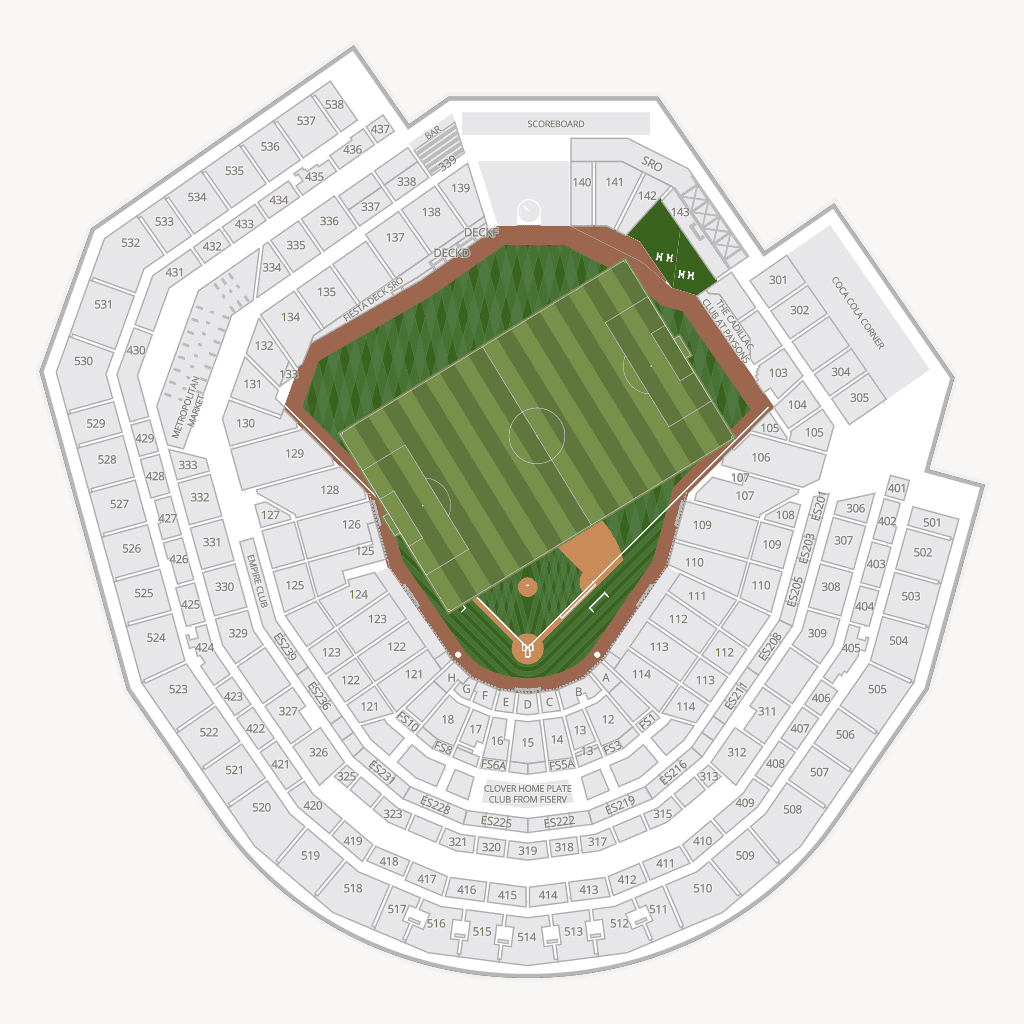
Alright, so this thing loaded up. It looked like a standard stadium map, you know, showing all the levels and sections. My first move was just to zoom in and out, get a feel for the layout. I had a general idea of where I wanted to sit – somewhere behind home plate but not too pricey, or maybe down the first base line.
I started clicking on different sections. When I clicked a section, like say section 115, it then showed me the rows. Pretty standard stuff. The cool part was trying to find the actual seat view. Some sections had this little camera icon or a prompt like “See the view”. Clicked on that.
It took a second to load, sometimes a bit slow, but then boom – it showed me a picture, sometimes a 3D-ish view, of what it would supposedly look like from that general area or even a specific seat. This was exactly what I was after.
- I clicked around the infield sections first. Compared views from the 100 level versus the 300 level.
- Checked out the outfield too, just to see what those looked like. Some looked surprisingly good, others felt miles away.
- I specifically looked for obstructions. Tried clicking seats near aisles or section breaks to see if any railings or walls might be in the way.
The Good Parts: It definitely gave me a better sense of perspective than just looking at a flat map. Seeing the angle towards the field, how high up you’d be, that was helpful. Some views were even panoramic, letting me pan around a bit, which was nice.
The Not-So-Good Parts: Sometimes the image quality wasn’t amazing. And you gotta remember, it’s a representation, right? The actual feel, the crowd, the atmosphere – a picture can’t capture that. Also, navigating between sections and views felt a little clunky at times. Click here, wait, click back, click somewhere else. It wasn’t super smooth sailing all the time.
Making the Call
So after maybe 20 minutes of virtually hopping around Citi Field, I felt way more confident. I compared a few sections in my price range, looked at the views from each, and weighed the pros and cons. That virtual view tool, even with its quirks, helped me avoid just guessing. I found a section on the lower level, first base side, that looked like it had a solid view without breaking the bank.
Ended up buying tickets in that area. Definitely better than just pointing blindly at a map. It wasn’t perfect, but it was a useful step in the process. Made me feel a bit more prepared for game day.