Alright, buckle up buttercups, ’cause I’m about to spill the beans on my Harley V-Rod Muscle escapade. It was a wild ride, literally and figuratively.

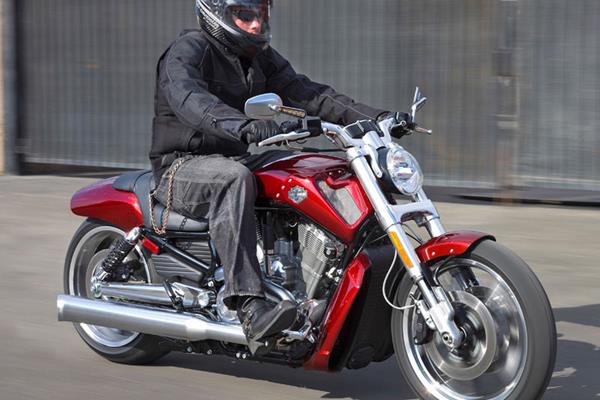
First things first, I snagged this beast. A 2009 V-Rod Muscle, bone stock. Looked mean, but felt… restrained. Like a caged tiger pacing back and forth.
Phase One: Wake the Beast!
- Exhaust: The stock pipes had to GO. Replaced ’em with a set of Vance & Hines slip-ons. The sound? Oh man, a deep, throaty rumble that makes your chest vibrate. Installation was pretty straightforward, just unbolting the old and bolting on the new. A little WD-40 helped loosen things up.
- Air Filter: Stock airbox? Nope. Swapped it out for a K&N high-flow filter. Figured if I’m gonna let it breathe, I might as well let it gulp. This required removing the gas tank (a little nerve-wracking, but YouTube tutorials are your friend) and some careful maneuvering.
- Tuner: All that extra air and fuel needed some managing, so I threw in a Screamin’ Eagle Pro Street Tuner. It’s a simple plug-and-play deal, but finding the right map for my setup took some trial and error. Ended up using a custom map from a V-Rod forum.
Phase Two: Comfort is Key (Sort Of)
Look, the V-Rod’s not exactly built for long hauls. It’s a head-turner, not a tourer. But I wanted to make it slightly less punishing on my butt.
- Seat: The stock seat was…firm. Upgraded to a Corbin seat. Pricey, yeah, but worth every penny. It actually supports your back and doesn’t feel like you’re sitting on a brick.
- Handlebars: Stock bars were a bit of a reach for me. Swapped ’em for some slightly shorter, more pullback bars. Made a world of difference in terms of comfort and control. This involved rerouting some cables and wires, which was a pain, but manageable.
- Grips: New grips! Because why not? Went with some Avon grips. They look cool and feel great. Easy peasy install.
Phase Three: Aesthetics, Baby!
Okay, now for the fun stuff. Time to make this thing truly mine.
- Paint: The stock silver was fine, but I wanted something with more pop. Got it professionally repainted a deep candy apple red with some subtle ghost flames. Cost a fortune, but DAMN it looks good.
- LED Lights: Replaced all the lights with LEDs. Brighter, more visible, and they look way cooler. This was mostly plug-and-play, but some of the wiring was a bit fiddly.
- Mirrors: Swapped out the bulky stock mirrors for some smaller, sleeker ones. Improved the look and didn’t sacrifice too much visibility.
The Result?
A Harley V-Rod Muscle that’s faster, louder, more comfortable (relatively speaking), and looks absolutely badass. It was a long process, full of swearing, scraped knuckles, and moments where I thought I’d completely screwed everything up. But in the end, it was totally worth it. This bike is an extension of me, a rolling middle finger to conformity. And I wouldn’t have it any other way.
So there you have it. My V-Rod Muscle journey. Get out there and wrench on your own ride. You won’t regret it.